
Please wait, I'm coming over...


Last Changed 4/27/2011 |
||
|
Bob Weinberg, a friend, wanted an CPE installation on his Foretravel
Motorhome to improve his Wi-Fi reception. He decided on a
Ubiquiti Bullet radio and an EnGenius EAG-2048 antenna for the
installation. The Bullet has a Type-N antenna connector on the top of the body that the antenna screws into. One of the challenges was to provide a mount for the Bullet as it normally is expected to hang from a mounted antenna. The EnGenius antenna comes with a mounting system but the system is not compatible with the Bullet radio. |
||
 |
This is the Bullet/2HP radio. Note the antenna connector on the
top of the body. This is the EnGenius EAG-2048 antenna. It is an 8db antenna in a compact format.. |
 |
 |
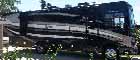
We had to run a CAT-5 cable from the Bullet inside the motorhome.
We were going to mount the Bullet on the Winegard Sensar (Batwing)
TV antenna. We were fortunate that Foretravel uses an access
panel for some cables from the Batwing antenna. We lifted the
access plate, slipped the CAT-5 under the plate and through the same
hole that the other cables used. Some new caulk and the CAT-5 cable entry into the motorhome was sealed. |
|
click on images to enlarge |
||
 |
We fabricated a mounting bracket from 1-1/2"x1/8" aluminum bar stock. The hole for the antenna was formed by
first drilling a 1/2" hole. Then using a Dremel tool, the hole
was carefully enlarged to where the threaded portion of the antenna
connector passed through the hole. We also cut two 1"x1/8" bar stock for spacers and Batwing arm reinforcement. |
|
click on images to enlarge |
||
 |
We removed the retaining pins of the upper Batwing arm and laid it
on it's side. We used a C-Clamp to hold the spacer plate to the Batwing arm to drill holes through the arm. When drilling, we were careful to slowly go through the top side of the arm and then removed the drill bit. We then checked that the antenna cable ,that is fed through the arm, was not is the way of the drill. Then we drilled the bottom holes in the Batwing arm. We then C-Clamped the reinforcement plate under the arm and drilled holes through the plate. |
|
 |
Here the bracket, spacer and reinforcement plate are bolted in place. The ideal would be 1/4-20 x 1-3/4" bolts, but the 2"
bolts we used had enough clearance. We used self-locking
nuts. The reason for the spacer is that as the Batwing is lowered, the spacer keeps the bracket from interfering with the lower Batwing arm. The reinforcement plate was used to remove crushing force to the arm, better load distribution that washers. |
|
click on images to enlarge |
||
 |
The antenna is inserted from the top of the bracket. The
EnGenius Antenna came with a sleeve that fits in the mounting
brackets the antenna comes with. That mount was meant for
U-Bolts around a mast. We trimmed that sleeve so than it causes the nut on the Bullet body to bind on the bracket, trapping it between the sleeve and the nut.. |
|
 |
The reason the hole was carefully enlarged was to insure the rim of
the Bullet connector would engage the bracket. Near the bottom, at the widest portion of the Bullet body, we attached a wire-tie plate using 3M Red Auto Trim double sided tape. A wire tie through the plate held the Bullet body at the bottom. The last step was to seal the top edge of the sleeve and the Bullet antenna connector. |
|
 |
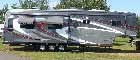
Here the Batwing antenna is elevated with the Bullet/EnGenius antenna. Tips, insert the CAT-5 cable through the Bullet cap before putting an RJ45 plug on it. The rubber plug could be removed and cut to allow a pre-manufacturer cable into the Bullet. Even though we kept the entry rubber plug intact, we still cover the entry point with rescue tape as the bottom end of the Bullet will be in the forward direction of the motorhome when lowered. |
|
click on images to enlarge |
||
Disclaimer: The information in this site is a collection of data we derived from the vendors and from our personal experiences. This information is meant as a learning guide for you to make your own decisions Best practices and code should always be followed. The recommendations we make are from our personal experiences and we do not receive any compensation for those recommendations. |