
Please wait, I'm coming over...


Last Changed 12/22/2008 |
||
|
One of the greatest pains in RVing is the holding tank indicator system. The classic RV system is notorious for erratic and bad
readings. |
||
Classic RV Tank Monitor System |
||
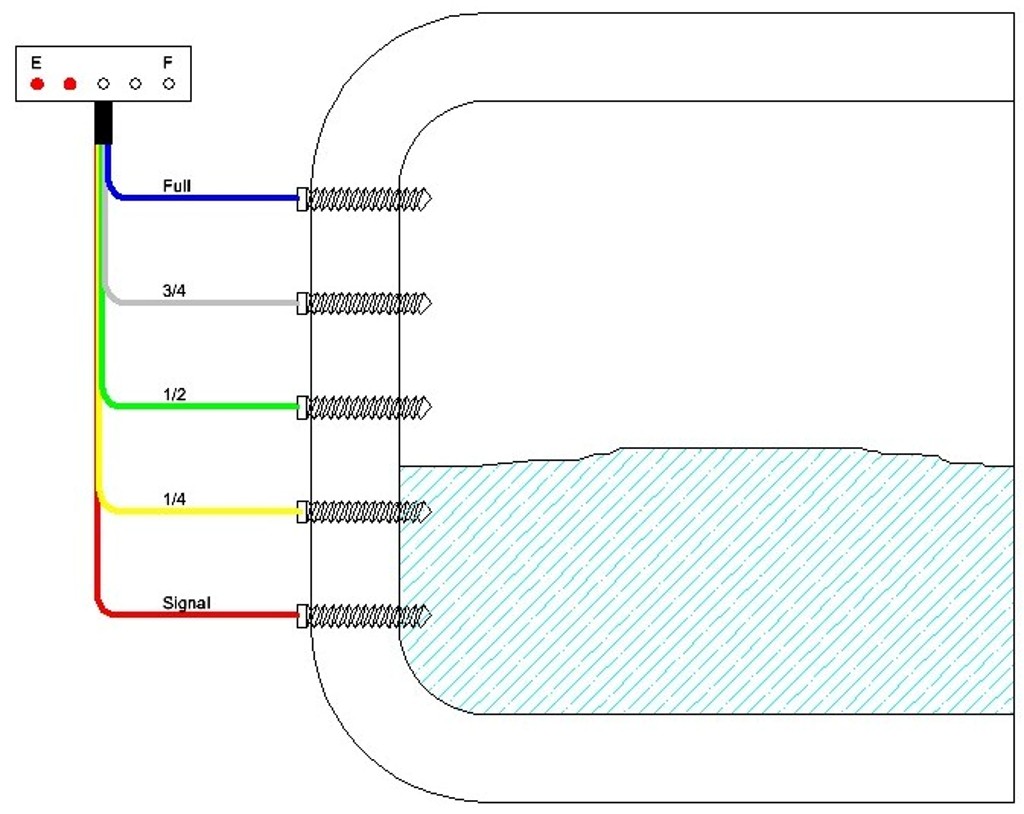 |
The classic RV holding tank monitor system uses metal contact sensors that stick into the tank area. As the fluid in the tank
covers a sensor contact, it completes a circuit between the Signal contact and the covered contact turning on a LED indicator. The typical system has four sensor contacts yielding readings of Empty, 1/4 Full, 1/2 Full, 3/4 Full and Full. |
|
click on images to enlarge |
||
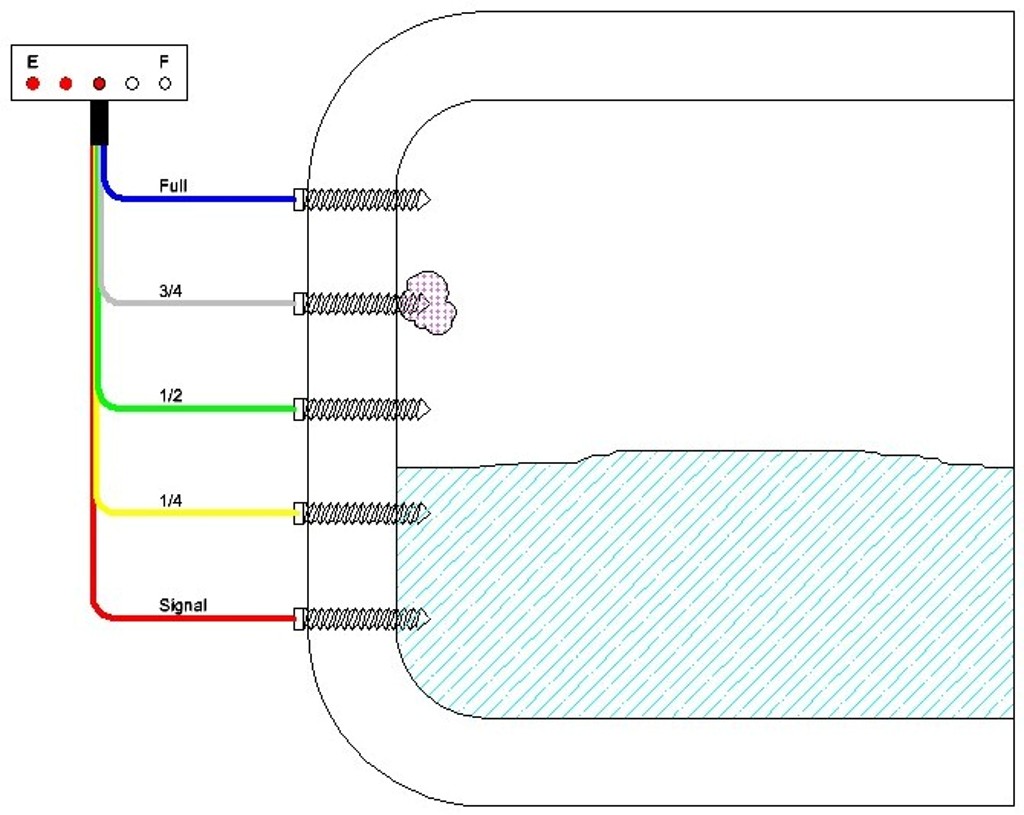 |
The usually failure of the classic RV holding tank monitor system is the buildup of contaminates on one or more of the sensor contacts. The contaminate buildup completes the circuit to the contact even when there isn't fluid covering that sensor. In this example, the fluid in the tank is displaying the 1/4 Full LED and the contaminated sensor is displaying the 3/4 Full LED. | |
click on images to enlarge |
||
|
|
Sometimes the display module will show the effects of a contaminated sensor contact by adding 1/4 tank to the actual reading. In this example, the fluid in the tank is displaying the 1/4 Full and the 1/2 Full LED (1/4 Full + 1/4). | |
click on images to enlarge |
||
There are countless solutions to cleaning the sensor contacts in the classic RV holding tank monitor system. Some work, most don't. It highly depends on the contaminate and how well it has bonded itself to the sensor contact. Sometimes the contaminate is simply a piece of toilet paper that a soapy type cleaner will free from the sensor contact. However some buildups are just too strong for cleaners or ice cubes bouncing around hoping to knock the contaminate off. |
||
New Technology Tank Monitors |
||
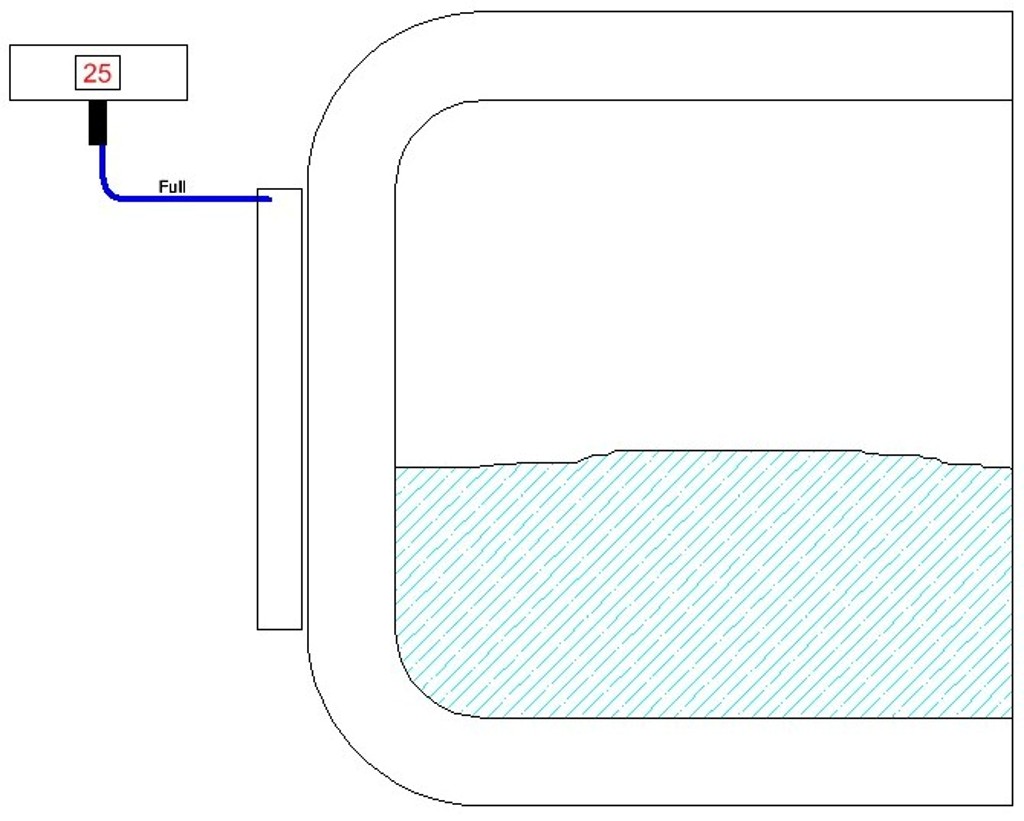 |
Newer style tank monitor systems, like the
SeeLeveL II system
use a sensor that mounts outside the tank and use capacitance to measure the fluid level in the tank. Since the sensor is mounted outside
of the tank, there is no change of contamination of the sensor. These capacitance sensors could give a false reading if some semi-solid material should adhere to a tank wall in the area of the sensor (Black tank stuff). The normal bacterial breakdown process that occurs in the tank will usually cause such material to free itself from the tank wall. All in all, the capacitance sensors are reliable and require no maintenance. |
|
click on images to enlarge |
||
Since we installed the SeeLeveL II System, a similar system also came on the market, the SensaTank RV 100. The concept is the same as the SeeLeveL with the differences being the sensors which are individually attached to the tank at 1/4 tank points instead of the sensor strips that SeeLeveL II uses. |
||
HistoryWhen we had our motorhome, Training Wheels, we had contaminated sensor contacts. We tried just about every contact cleaner and procedure for clearing the sensors we found on the internet with no success.Early on in our RV research, we had found these newer alternative sensor system to use instead of the classic RV system. However, this research was done very early in the process and was managed to be overlooked when ordering Tige. We choose the SeeLeveL II System for two reasons. One, there was control/display panel that had the switches we needed to control the water pump and hot water heater. The other and more important reason was that the SeeLeveL II System was the system most added by Travel Supreme. |
||
InstallationThe installation is well within the capability of most handy people. We had our SeeLeveL II System installed by the Travel Supreme factory support people not because of the SeeLeveL II System but because of the sealed belly of Tige. Taking the belly pan off and re-installing it was a task we preferred someone else to do. |
||
SeeLeveL II System Monitor |
||
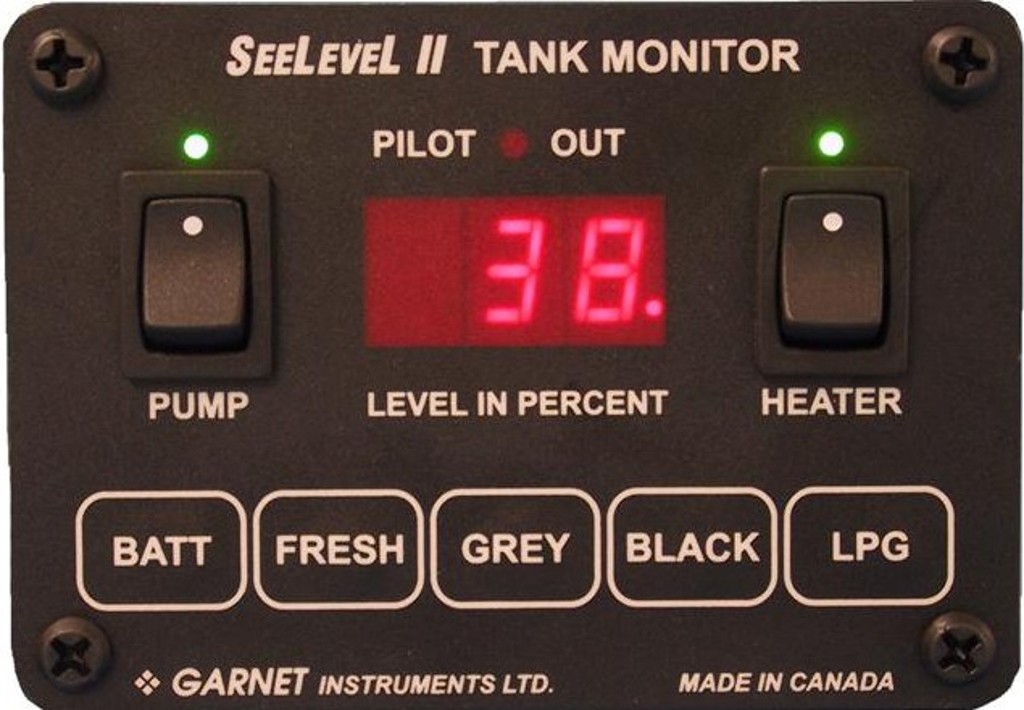 |
This is SeeLeveL II System monitor. We use the model with the water pump switch and the water heater switch. | |
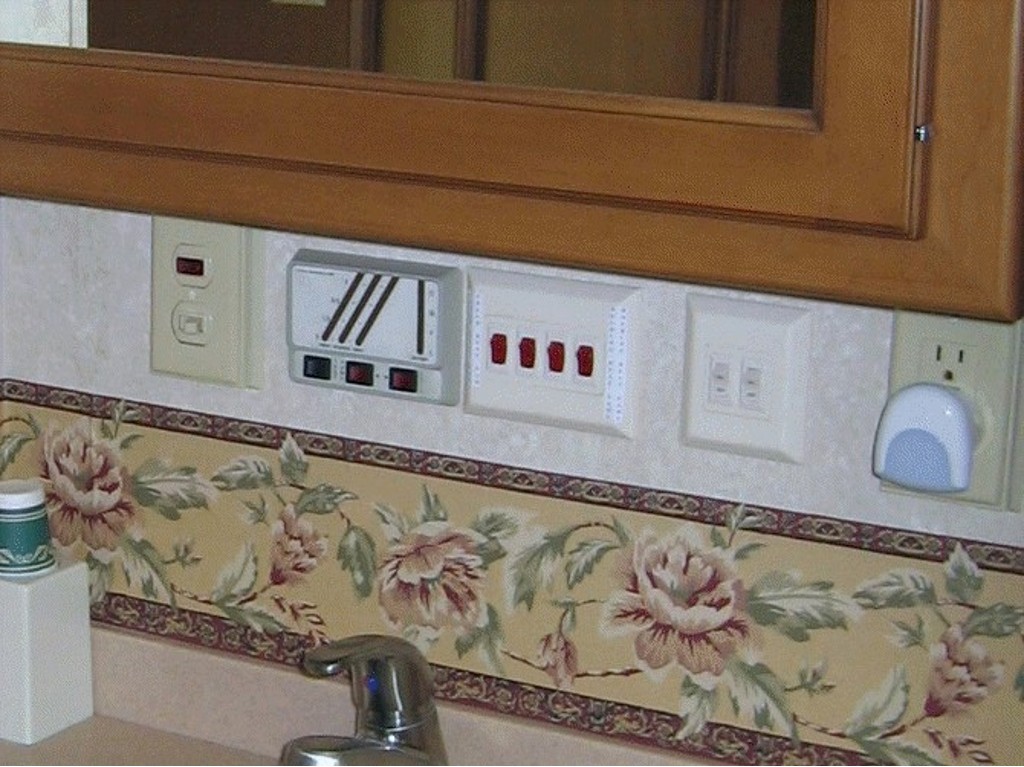 |
This is how our original tank monitor looked. | |
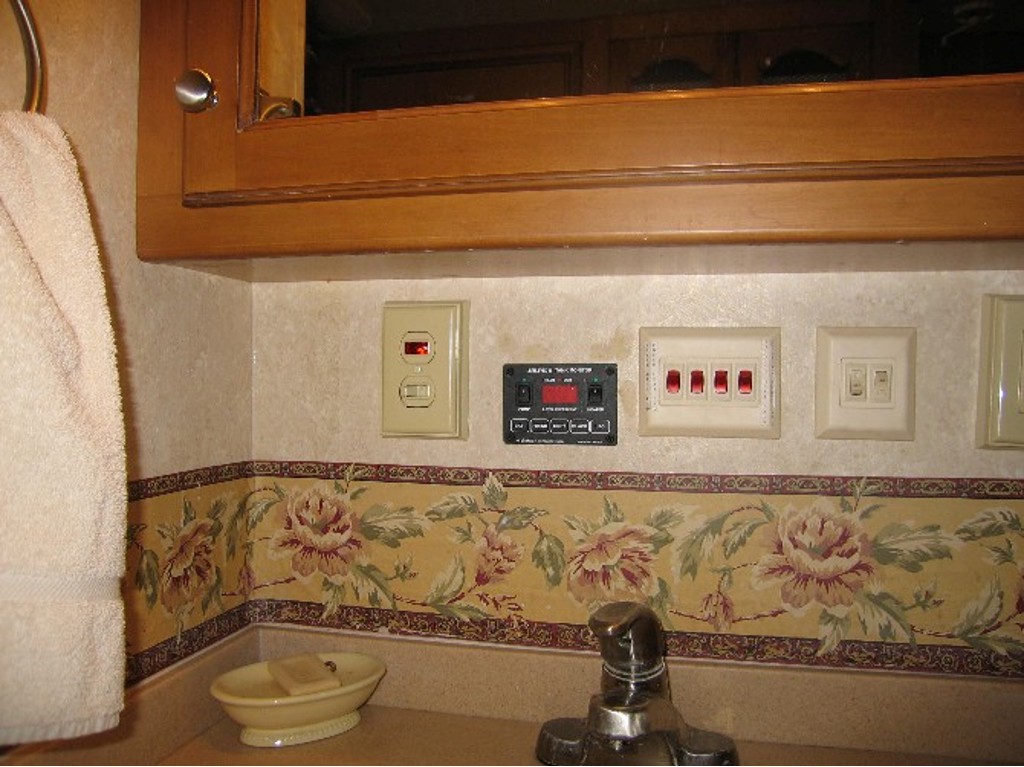 |
The SeeLeveL II System monitor fits in the same space and provided the same switch functions. | |
click on images to enlarge |
||
SeeLeveL II System Sensor |
||
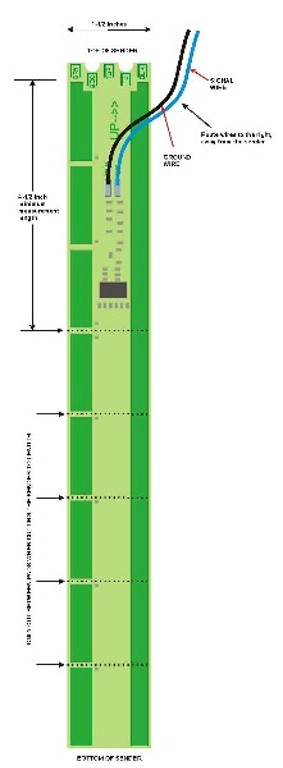 |
The SeeLeveL II Sensor is a flexible Mylar strip with printed circuitry on it. It is designed to be trimmed at 1-1/2" intervals
to make the sensor as close to the height of the tank as possible. There are notches at the top of the SeeLeveL II Sensor that are cut off to identify the sensor as being for the Fresh Water Tank, The Gray Water Tank, or the Black Water Tank. One side of the SeeLeveL II Sensor has a self stick coating. The installation is simple; clean the surface of the tank, remove the protective cover for the sensor, and place the sensor on the side of the tank. Last step is to connect the wires. |
|
click on images to enlarge |
||
SeeLeveL II System Wiring |
||
 |
The wiring of the SeeLeveL II System is more simple than the classic RV system. In the classic system, each tank is wired back to the
control/display panel. The SeeLeveL II System uses bus wiring which means each sensor attaches to the same two wires. If replacing a classic RV system, then two of the existing wires can be used to connect the SeeLeveL II System. |
|
click on images to enlarge |
||
Disclaimer: The information in this site is a collection of data we derived from the vendors and from our personal experiences. This information is meant as a learning guide for you to make your own decisions Best practices and code should always be followed. The recommendations we make are from our personal experiences and we do not receive any compensation for those recommendations. |